If I was a sewing machine, I would want a cozy that looks as pretty and as cozy as the one I made.
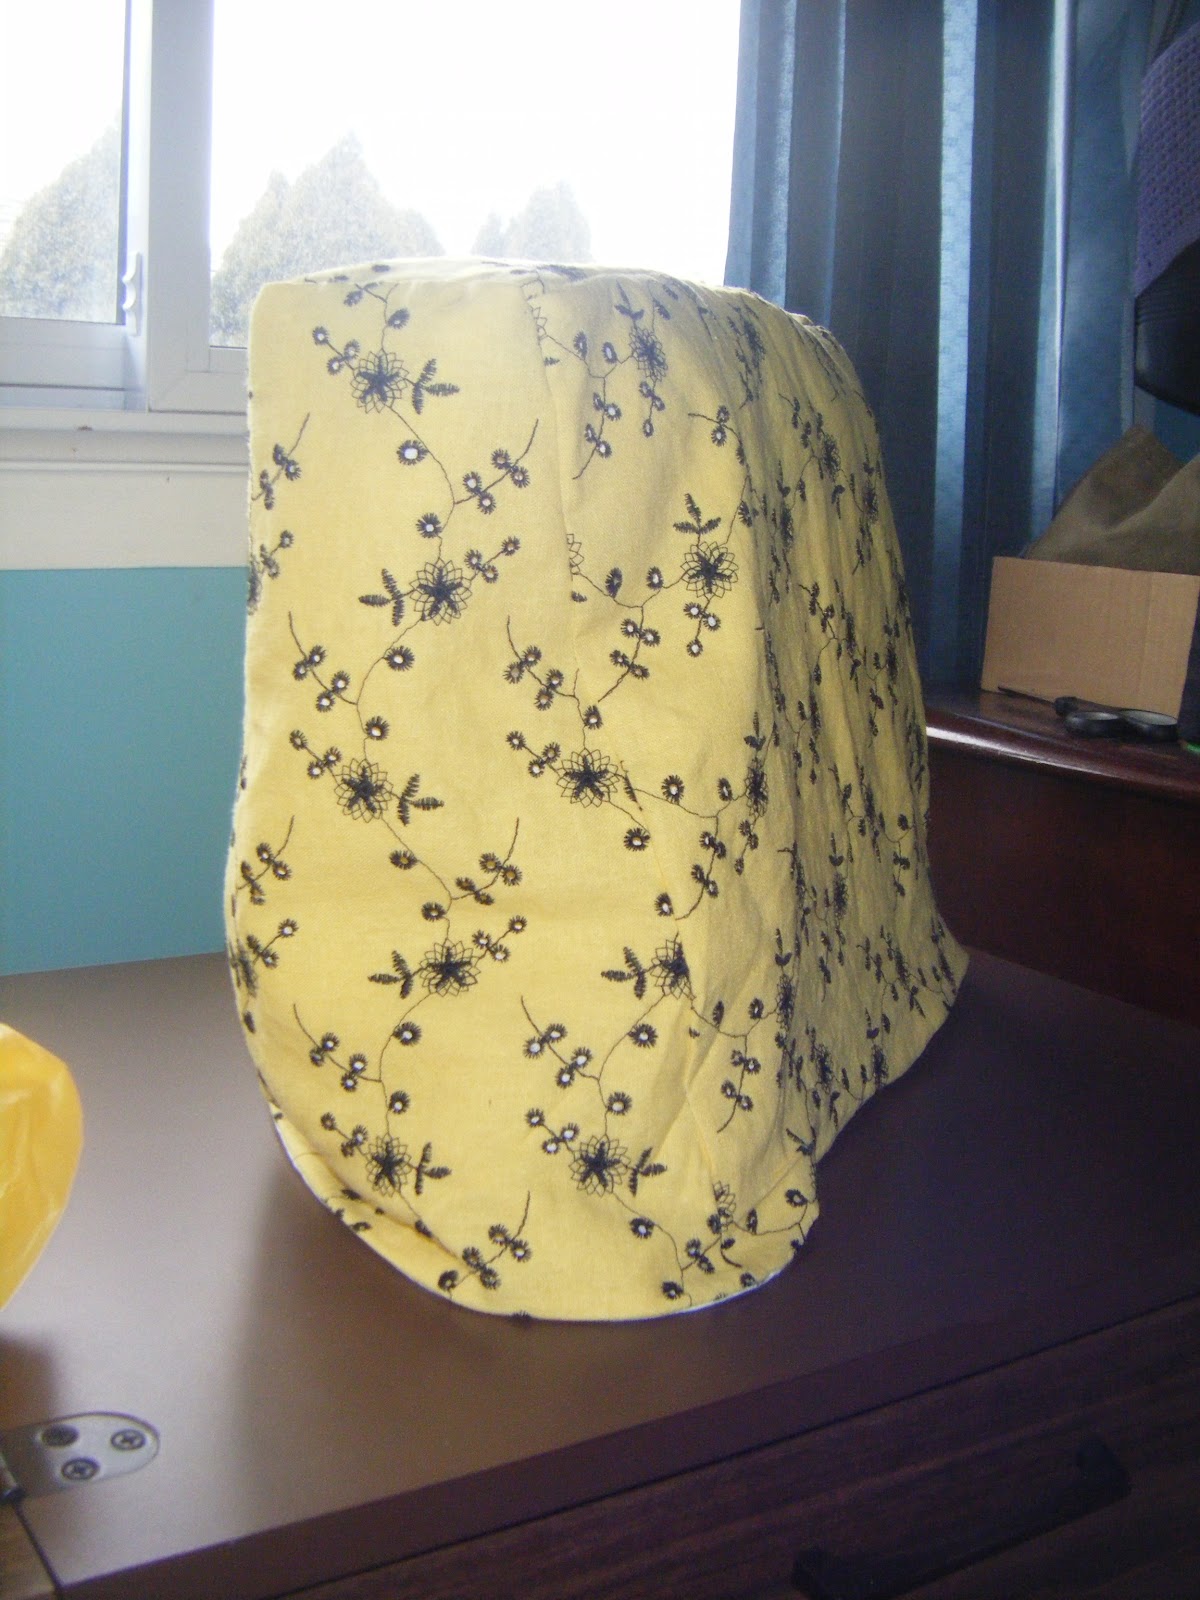
I am not going to even hold back, my cozy looks so good. I am so impressed with what I accomplished with a needle, fabric and thread. Is it perfect? Absolutely not. But the imperfections are so minuscule that they are not noticeable.
I almost made the same mistake that I made last week when I tried to finish the cozy. If I didn't take the time to learn from that mistake, I would have made it again. I'm glad I caught it just before I started sewing because now my mother's sewing machine has a lovely cozy.
The one part I had some trouble with was figuring out how to sew the liner and the outer together so that the seams would be the right way. It took me some time to figure it out because it required some abstract thinking of what I needed it to look like when I was done with it. The one part that I had the most trouble with was sewing the last bit of the seam so it wouldn't show the stitches.
For those of you who don't sew, in order to have the seams be perfect and to show the right side I had to sew the bottoms of the layers together with the right sides touching. Think of two bags. One bag is the inside layer and the other is the outside. Sew the bags together where they touch to make one a double layered bag. But you have the ugly sides of the bag facing out, and what you want is the pretty sides on the outside. So, when you're just about done sewing the bags together, leave a hole big enough to reach inside the hole to pull the bags inside out through the hole. The hole also has to be small enough to finish the seam without the thread showing. In order to finish the seam, it has to be hand sewn. This is tricky. I had some trouble and it's not perfect, but it's also not noticeable unless you go looking for imperfections.
360° view:
I feel really good about my cozy, but now it's time I moved on and tried something different. I also really want to find fabric that actually has a nice print. The fabric store here is not the greatest and the print fabrics are kind of ugly.
Wednesday, 29 February 2012
Wednesday, 22 February 2012
Something bad happened...
I was really excited to sew the outer part of my cozy and then something bad happened. I know what you're thinking, something bad happened? Yes. Something bad happened. I sewed the wrong sides of the fabric together on both seams of one of the sides of the cozy.
#$%$**%^&#%#$!%&^
#$%$**%^&#%#$!%&^
Those characters don't quite express my frustration to its full extent, but I'm sure you get the picture.
Anyway, I tried to use the seam ripper to take apart the seams but the fabric is very prone to fraying and the tension on the sewing machine is at a pretty tight setting making it difficult to not slice the fabric while trying to rip the seams. Pretty much the fabric was no good, so I decided to move on to my newly formed Plan B.
I'll break it down for you. Plan B required me to check to see if I had just enough fabric left so that I could cut out pattern pieces to replace the ones that were just ruined. Oh, I forgot to mention that at this point I had only one side of the cozy left to sew together. So, here I was with one original piece left and feeling rather desperate placing the pattern over the remaining fabric and hoping that I wouldn't have to go out to buy more.
Luckily, I literally had just enough left. I cut out the pieces and so far I have basted one side. Considering this incredible learning experience, I will finish sewing another day when I have time to get it right. Well, my fingers are crossed that I don't mess it up cause that would just be sad.
Wednesday, 15 February 2012
Folks, I have a liner!
I am
beyond excited right now. I am only half way done my cozy but I have completed
the liner and I am so proud of it! Every time I finished stitching a side I
would get really excited. I jumped the gun a little and I didn't pin one of the
sides before I sewed and I messed it up a tiny bit. It's not noticeable though. I am slightly concerned that it may pose a problem when I sew the
outer layer and the inner layer together, but for now I will just bask in my
excitement and worry about that when I get to that part.
This was my first error. |
I did
start the sewing process today a tiny bit discouraged because I made a few
errors. I only have a photo of my first boo-boo because the second one is not noticeable in the photos. Anyway, I had to pull out the seam ripper to fix the errors but once I saw the
project coming together, I no longer thought about those errors and I
successfully completed the liner. I really wish I could finish the entire cozy
right now, but I have plans to go see The Vow with some friends and since I
have been waiting to see this movie since May of last year, I have zero intention of
bailing.
I don’t
have a different project planned for me just yet, but I am already excited to
sew it and I haven’t even finished this one yet. Actually…I may have a little something
planned, but you’ll just have to wait to find out!
Completed liner :) |
Tuesday, 7 February 2012
Sick days are meant for sewing...
I took a sick day today and sick days are rather boring, so I decided to pass the time I would do a little sewing. I made the pattern for my sewing machine cozy with newspaper and used that to cut the fabric. I'm somewhat of a perfectionist so this took a lot more time than I thought it would. I think it turned out rather successfully though. I had to cut the pattern for the lining and the outside of the cozy, but I found that it got a lot easier once I got used to cutting and not being so scared of messing up. I used the pieces I cut out from the liner fabric as my pattern for cutting the outer fabric of the cozy instead of using the newspaper print pattern. I don't know if you're suppose to do that, but it worked out just the same.
Newspaper pattern on the liner fabric before I cut. |
Cutting the outer fabric for the cozy. My hair got in the way, but it's a cool shot. |
I learned in my research that basting would allow me to keep my fabric together and it would also help to guide my stitching. It is time consuming, but it's worth it. First I used my pins to keep the fabric together and then I hand basted the fabric. When I had actually sewn the fabric with the machine, it was really very easy to simply pull the hand basted thread out of the fabric.
The fabric pinned and basted. |
I did not do a whole lot of actual sewing today, but I did sew two pieces together. My friend Gillian (read her wedding blog!) commented on my last post and suggested I sew slowly with the machine and sewing in a straight line would be easier. I took her advice and it was much much easier to get my line straight. I did veer off course a little bit, but I tried to straighten it back out and I have many more pieces to sew that I cannot focus on a tiny little error.
This is probably when I compromised the straightness of my stitches. |
Finished product...for now. |
It feels as though I did not do much today, but it took up a lot of time. The next time I sit down at the machine, I want to take the time to finish the entire cozy, but since I will be basting the pieces together before I machine sew the pieces, it may not happen since it does require me to have the time and patience. I am excited to have the actual finished product now that I can see it coming together. Stay tuned!
Tuesday, 31 January 2012
Les instructions sont en français...
I spent 6 years of my life in French Immersion, but it has been at least 5 years since I have studied the language let alone spoken or read the language. I bring this up because the only instruction manual I can find for the sewing machine is half French and I am guessing that the other half is in German. I do understand part of what I am reading but it requires a whole other level of learning just to force myself to have the mental capacity to understand what I am reading. If the manual didn't have pictures, I would literally be a lost cause right now.
Since the machine is my mother's, I asked her some stuff and she was helpful in telling me what I needed to do to wind the thread on the lower bobbin, but she quickly walked away without actually showing me what to do. I am more of a hands-on learner, so to have her walk away after an explanation didn't help me a whole lot. I did attempt to read the instructions and follow the pictures but I was unsuccessful:
Clearly, not what was suppose to happen. I ended up calling for my mom to come back to help me, which she did do after I summoned the 5-year-old in me and whined, "¡Mamiiii, necesito ayuda!" For the non-spanish speakers that means "Mom, I need your help." I may be 23, but I still am and will always be my mother's little girl. Anyway, she helped me and the result was a significant improvement:
My plan for today was to make a stitch sampler, but instead it turned into me trying to figure out how to stitch the fancy embroidery in a straight line. I was unsuccessful, but I when I wasn't trying to be fancy I managed to stitch in a straight line and for now that is most important. In the process of taking this photo I didn't realize I cut off the the last stitch line, but it's not any better than the others so I didn't feel it was worth trying to capture.
On a very good note, my mother came home today with some really great scissors for cutting through fabric. I had to cut some of the fabric so that I could have some pieces for several attempts at a stitch sampler and I found that the scissors I had were not the sharpest. I never told my mom this, but it's as if she read my mind and when she came across a great pair at a great price she knew that I needed them. She's leaving for Honduras for almost three weeks in a couple of days and I am already beginning to question how will I fare without her assistance. She raised me to be an independent person so I know I don't need to be overly concerned, but I'll miss her nonetheless. My dad only tends to come into the room to ask me if I'm good enough to stitch him a pair of pants or to fix a hole or two, whereas my mom asks how my progress is going and even though she laughs at my inability to keep a straight line, she always manages to offer words of advice and encouragement.
Over these next couple of weeks I will really need some luck to as I attempt to make a sewing machine cozy with an inner-liner. My friend Jenna says that I should scrap the liner but if I do that the cozy will be incredibly flimsy and it won't have any real structure to it. So, I am going to be overly ambitious and give it a try. I figure the internet will be a useful resource in helping me figure out what to do and if I really need to I'll just go to the fabric store and ask for some guidance.
Wish me luck!
Monday, 23 January 2012
Preparation
Bienvenidos amigos! This is my blog about my adventure (or possible misadventure) into learning how to sew. I have little to no experience in the art of sewing. My past endeavours into sewing were complete and utter disasters, but I have learned from those mistakes and I have decided that the best way to learn is to start from the basics and ease my way into more advanced projects.
The first book is called The Sewing Book. From this moment on, this book will be referred to as my sewing bible (or bible for short) because it literally has everything I need to know to get started. The bible is descriptive and more importantly, it has glossy colour photos.
The second book is called Amy Butler's In Stitches: 25 Simple and Stylish Sewing Projects. This book has what appear to be simple sewing projects, some of which I am hoping to complete. The one project I have my heart set on eventually sewing is the gorgeous patchwork duvet cover on page 63.
Step 2: Sewing area
In the past I unsuccessfully replaced an invisible zipper on a pair of dress pants, but I now know why it was such a disaster: I didn't have an invisible zipper foot. At the time, I had no clue that certain sewing techniques required different feet (nor did I know "feet" was a sewing term). This time around I am prepared to learn from the beginning and I have taken what I feel to be necessary steps before I stitch thread to fabric.
Step 1: Books
Step 1: Books
![]() |
The Sewing Book by Alison Smith |
![]() |
Amy Butler's In Stitches: 25 Simple and Stylish Sewing Projects |
The second book is called Amy Butler's In Stitches: 25 Simple and Stylish Sewing Projects. This book has what appear to be simple sewing projects, some of which I am hoping to complete. The one project I have my heart set on eventually sewing is the gorgeous patchwork duvet cover on page 63.
Step 2: Sewing area
I hijacked the spare bedroom and put in a sewing table that for the last decade has been used as a TV stand in my bedroom. I will post a photo of my new sewing room once I have spruced it up a bit and when the sun is shining. I did take some photos but the gloom and doom of the rain outside does not make for good lighting.
Step 3: Gathering essential tools
A) Bent-handled shears
B) Fabric shears
C) Paper shears
D) Embroidery scissors (will be used for cutting threads and cutting small details in fabric)
E) Hobby knife (includes blades for ripping seams and cutting button holes)
F) Sewing gauge
G) Tape measure
H) Clear rulers
I) Pin cushion
J) Pearl head pins
K) Safety pins
L) Chalk marking pencil
M) Sewing machine
I am fortunate enough to have a mother who owns a sewing machine, but I did go out and buy everything else. I went to Dollarama and Fabricland to get the rest of the supplies. Dollarama was great because nothing was over $2 and I was able to save some money on the pins, rulers and tape measures. Fabricland was more expensive but I was able to buy a basic sewing kit that included a lot of the items I needed. More importantly, I saved money by buying items that were on sale.
One item that is missing from my list is a container to keep the tools in. Currently, I am using a small yellow toolbox that I found in my house. So far, it is the perfect container because it has different compartments that make it easy to keep the box organized.
During my shopping trip, I took the opportunity to buy some fabric for my first two projects. Since I am starting at the basics, my first project will be to make a stitch sampler. From my past experiences using the sewing machine, I often forgot which way the machine feeds the thread, so I feel like a stitch sampler is the logical first step in getting used to the machine and being able to get a feel for the different stitches the machine can make.
Step 3: Gathering essential tools
A) Bent-handled shears

C) Paper shears
D) Embroidery scissors (will be used for cutting threads and cutting small details in fabric)
E) Hobby knife (includes blades for ripping seams and cutting button holes)
F) Sewing gauge
G) Tape measure
H) Clear rulers
I) Pin cushion
J) Pearl head pins
K) Safety pins
L) Chalk marking pencil
![]() |
Brother VX-1140 |
I am fortunate enough to have a mother who owns a sewing machine, but I did go out and buy everything else. I went to Dollarama and Fabricland to get the rest of the supplies. Dollarama was great because nothing was over $2 and I was able to save some money on the pins, rulers and tape measures. Fabricland was more expensive but I was able to buy a basic sewing kit that included a lot of the items I needed. More importantly, I saved money by buying items that were on sale.
One item that is missing from my list is a container to keep the tools in. Currently, I am using a small yellow toolbox that I found in my house. So far, it is the perfect container because it has different compartments that make it easy to keep the box organized.
During my shopping trip, I took the opportunity to buy some fabric for my first two projects. Since I am starting at the basics, my first project will be to make a stitch sampler. From my past experiences using the sewing machine, I often forgot which way the machine feeds the thread, so I feel like a stitch sampler is the logical first step in getting used to the machine and being able to get a feel for the different stitches the machine can make.
Subscribe to:
Posts (Atom)